0

Toddler food: leek and potato soup

I make this soup a lot, especially in the winter. It’s cheap, it’s easy and it’s super healthy. The kids absolutely love it! Its a brilliant way to get loads of veggies in them and it’s really filling and especially nice with crusty bread on a cold day! I make lots of it and then put a tub of it in fridge for the next day and freeze some. It’s perfect for toddler lunches!

Ingredients:

225g potatoes in small chunks
3 leeks
large onion, sliced
1.5 pints vegetable stock
Teaspoon of butter or splash of oil

Put the butter in a saucepan and lightly brown the onion. Add the potatoes and leeks and vegetable stock and leave to cook until all the veg is soft. Take it off the heat and whack it all in the blender until it is as smooth as you want it – we have outs quite thick and chunky.

We eat quite a lot of homemade soup so watch out for more recipes!

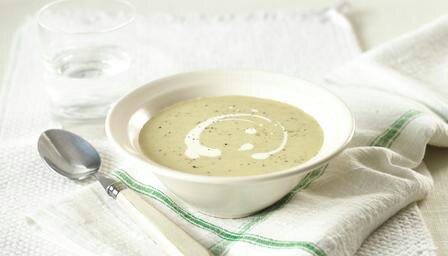
The photo isn’t of my soup, its from the BBC food website – I’m a bit rubbish at making food look pretty!

image

0

Toddler food: leek and potato soup

I make this soup a lot, especially in the winter. It’s cheap, it’s easy and it’s super healthy. The kids absolutely love it! Its a brilliant way to get loads of veggies in them and it’s really filling and especially nice with crusty bread on a cold day! I make lots of it and then put a tub of it in fridge for the next day and freeze some. It’s perfect for toddler lunches!

Ingredients:

225g potatoes in small chunks
3 leeks
large onion, sliced
1.5 pints vegetable stock
Teaspoon of butter or splash of oil

Put the butter in a saucepan and lightly brown the onion. Add the potatoes and leeks and vegetable stock and leave to cook until all the veg is soft. Take it off the heat and whack it all in the blender until it is as smooth as you want it – we have outs quite thick and chunky.

We eat quite a lot of homemade soup so watch out for more recipes!

The photo isn’t of my soup, its from the BBC food website – I’m a but rubbish at making food look pretty!

image

2

Paper mache bowl

I used to love doing paper mache when I was little, especially at school when you cover a balloon and then pop it!
I originally intended for the kids to make a few of these for Christmas presents but they do take quite a while and we just didn’t get chance to do any more, and I have kept this one on my dresser to hold odd coins and bits.

We put a layer of cling film inside a small plastic bowl. This helps it to separate easier when you’ve finished. We then made up a mixture of PVA glue and water (probably 2/3 glue, 1/3 water) and ripped up paper into small pieces. We just used scrap paper that we had because newspaper can be a pain to paint over because the print shows through. I have also seen it made with shredded paper from a shredder, which looked good but I’m sure would be quite fiddly for toddler fingers!

We dipped each piece of paper into the glue mixture and then placed it on the cling filmed bowl, eventually covering it all. We did a couple of layers and then left it to dry which took about 24 hours,then repeated. I think we did about seven or eight layers as we wanted it to be quite strong, so took over a week!

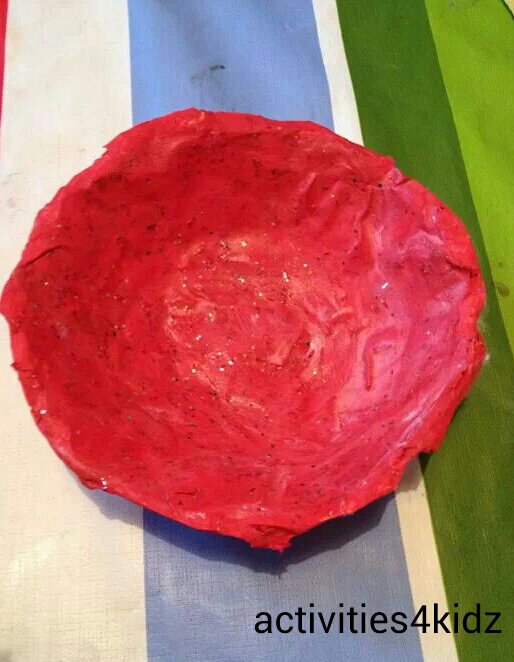
Once we had finished, we painted it. We chose a nice bright red colour and gave it a couple of coats, leaving it to dry in between. When the paint had dried we trimmed the edge of the bowl and then covered it in one more layer of PVA glue and water. This helped to seal the paint,give it a little more strength and a glossy finish. We added some glitter to the glue as well to give it a subtle sparkle!

What do you think?

image

image

#AllAboutYou Link & Pin Party Mama and More
8

Paper mache pizza

Harrison loves playing with his Melissa and Doug Pizza Party set but because it comes apartĀ he couldn’t use it properly with his market stall. A mooch in the craft cupboard provided me with two cardboard circles, no doubt from all the packaging in Christmas presents, and it was perfect for a pizza!
We used the smaller one as a trial, and I think we’re going to use the other one with felt toppings for a busy bag.

To begin with, Harrison helped me roll up some paper into a sort of long thing sausage shape. We used just sheets of a4 paper but newspaper would better(I really need to keep newspapers for this sort of thing!). We then curved it round the edge of the circle to make the pizza crust and taped it down with lots of masking tape. We didn’t stick to the base, although you could, we just laid it on the top.

image

Then we got some kitchen roll and ripped into bits, andĀ pasted it on with a mixture of PVA glue and water. We covered the entire pizza, making sure none of the masking tape was showing as it’s really difficult to paint over, and then left it to dry and go hard overnight.

image

This morning, we chose our paint colours – brown for pepperoni, light brown for the pizza crust and dabbed on red and yellow for cheese and tomato, and blobs of green as peppers. Harrison did the red and yellow dabs and I did the rest as he is still at the age of splodging paint anywhere.! We left it to dry and then I gave it a final coat of PVA/water mix to seal it and harden it. It looks great and is perfect for the market stall. We’re also waiting for a paper mache ice lolly and cake to dry so watch here to see how they turn out!

image

Feel free to share your ideas for making play food!

The Fairy and The Frog
0

Circle printing

In the summer, we started working on shape and colour with Harrison. As we were lucky enough to have had such nice weather (for once!) we did most of our art and crafts outside.

We decided to start with circles, as it is the easiest shape to draw, its difficult to confuse with other shapes (rectangles & squares) and a circle forms a base for many letters.

We started off by going on a circle hunt. We went round the playroom and the kitchen finding as many things as possible that were circular.

We found:
Cookie and play dough cutters
Lids to jars (all different sizes)
Bowls
Cups
The little measuring thing you use for washing machines
Tubs
Building blocks

It’s amazing what you find when you’re looking! We then chose a colour. At this point Harrison knee that red and blue were colour words but I don’t think he could actually identify the colour, son we chose red. We put some paint on a plastic plate and then got to work dipping the circles into the paint and then printing it into the paper. I kept repeating the vocabulary – ‘ that’s a nice red circle’, ‘can you print me a big red circle?’ etc, and we counted all the circles. We noticed that some were big and some were small, and that the cookie cutters made a wobbly edge!

The great thing about this activity is that you could choose different shapes and colours to focus on.

image

11

Melissa and Doug Pizza Party Review

For Christmas, Harrison and Alex had some Melissa and Doug sets. I had asked for these as they looked lovely and when we played with them I was even more impressed.

Melissa and Doug are an American company that specialise in toys that promote creativity and imagination. Most of their toys are wooden which I especially love as I have a soft spot for wooden toys. They last longer and always look much more beautiful than plastic ones!

My personal favourite is their pizza party set. You can buy it from the entertainer http://www.thetoyshop.com/Baby-and-pre-school/Wooden-toys/Melissa-%26-Doug—Pizza-Party/p/377523.

It comes presented in a beautiful wooden tray that holds the set together. My only tiny criticism is that it doesn’t have any sort of lid – but that literally is the only negative thing I can say!

image

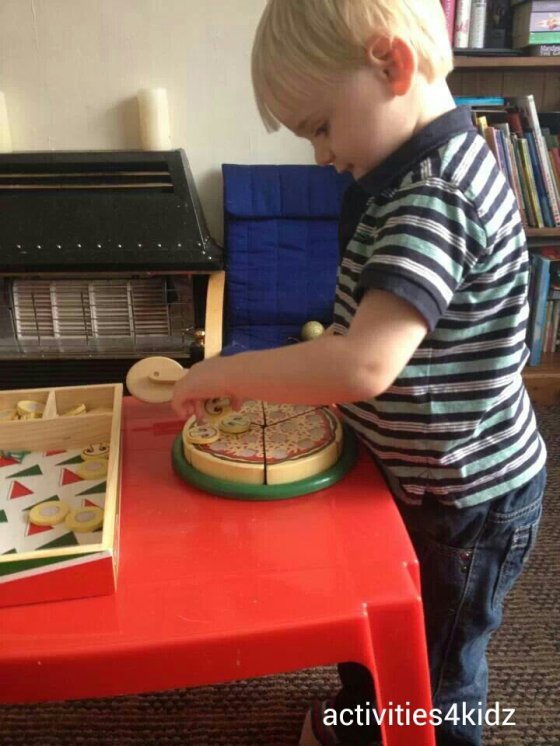
It is a beautiful wooden pizza with Velcro on so it can hold together or be ‘cut’ with the wooden pizza cutter tool into six slices. This is brilliant for early numeracy skills. We’ve been using it to count! It is also a way of introducing basic fractions to children. We’ve already started talking about haves using it. If I was still teaching in schools, i’d definitely be using this for fraction lessons!
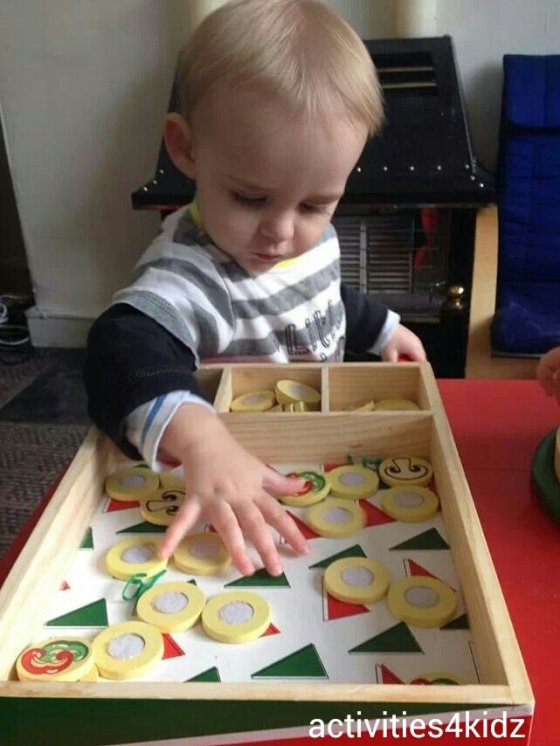
It comes with over 50 ‘toppings’. These are small round discs with a picture of mushrooms, peppers or salami on and have Velcro attached so they stick to the pizza slices. You can put three toppings on each slice. Again this is fantastic for numeracy skills. Harrison likes to ask me which toppings I want and I can give him various answers e.g. two mushrooms and one pepper. We also had fun sorting out the toppings and making sure they were in the right space!

image

So far we have had loads of fun with this, and we can use it alongside our toy market stall and kitchen for brilliant role play. It’s also given me a great idea for a craft activity – watch this space!

If you’re looking for a lovely durable toy, I would definitely recommend this!!

image

ohsoamelia

4

Painting with feet

I definitely recommend doing this on a warm dry day and in the garden unless you’re very brave daft, as it does get rather messy!!

Harrison had great fun doing this. I ripped off some paper from a roll of lining paper (Ā£2 from Wilko, great for loads of art activities!) and weighed it down with some large stones. On plastic plates I squirted some red and blue paint (the washable stuff used in schools). Then we took our shoes off, put our feet in the cold slimy paint and walked and stamped and marched all over the paper. It was so much fun!

image

I made sure I was prepared before hand and had a washing up bowl of warm soapy water and a towel ready to wash feet when we’d finished. Still ended up with colourful footprints on the yard!

We will definitely be doing this again in the summer (weather permitting!) but will change it a bit by putting blobs of different coloured paint on the paper first rather than on plates, and now Harrison is less fussy about paint on his hands we will use hands and feet.

Because we had such a big piece of paper we didn’t keep the whole piece of paper, I just cut an a4 size bit off for their art folder but I would fold it up and keep it next time and use as lovely personalised wrapping paper – could plan ahead and use festive colours for christmas paper!

image

One of the mum, Kayleigh, in the Activities 4 kids Facebook group (please feel to send a request to join!)  also did this activitiy with her daughter – as you can see messy but fun!!

image

image

image


0

Invitation to Play: Playdough and Pasta

I was looking through the pictures on our Facebook page (link( and found photos of our very first ‘invitation to play’.
When we did this activity back in January there was absolutely no planning involved. I just remember there being thick snow outside, Gray was working 12 hour shifts, I had a 9 week old baby and 19 month old toddler to amuse! This was a spur of the moment activity before I’d ever heard of Pintrest or anything like that, and it kept Harrison amused for ages!

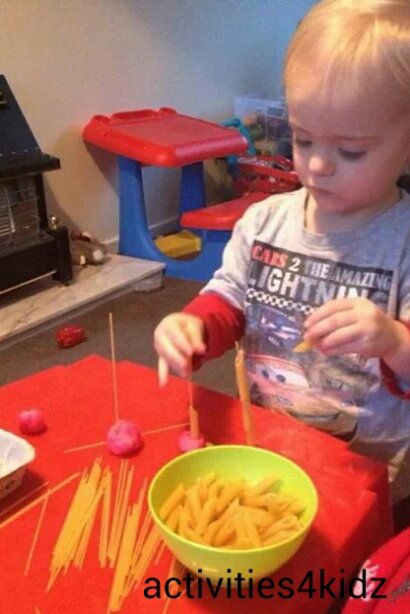
The set up was really easy and quick. On his little table I gave him a pot of play dough, and a tub with dried pasta tubes and dried spaghetti and left him to it. Within minutes he was making balls of dough and sticking the spaghetti strands in, and then threading the dried pasta onto the stands. It was a perfect activity for developing fine motor skills!

Now he’s a year older I’m going to do this again,and let Alex have a go. I will challenge him more this time by asking him to count the pasta tubes. I’m going to provide a bowl of cheerio-type cereal for threading as well, and see if we can thread x amount of cereal on the strands of spaghetti.

A brilliantly simple and quick activity that kids will love!

image

0

Play dough fun

The kids love play dough. Truth be told, I love it as well. We already had a big box full of it and lots of cutters,and the n for Christmas they had loads more,and several sets of cutters and rollers and other accessories.

I think playdough is a fantastic thing for kids. On a miserable wet day there is nothing better than laying a plastic sheet on the floor and getting the play dough out. We have hours of fun with it.

It’s a fantastic material for developmental play. It’s malleability means young children can manipulate it easily, helping to develop fine motor skills. The opportunities for imaginative play are endless – we’ve used it for ‘cooking’!

Play dough has been around since the 1950’s – not many kids toys have been going for that long! It’s relatively inexpensive and lasts ages if looked after. We also tried making our own, Gingerbread play dough which is great because you can make it scented -the only the only thing I hate about play dough is the smell!

We have lots of fun just rolling, patting and using cutters on it but I wanted some ideas to make it even more fun. I haven’t tried these yet but will be soon, and wanted to share them with you.

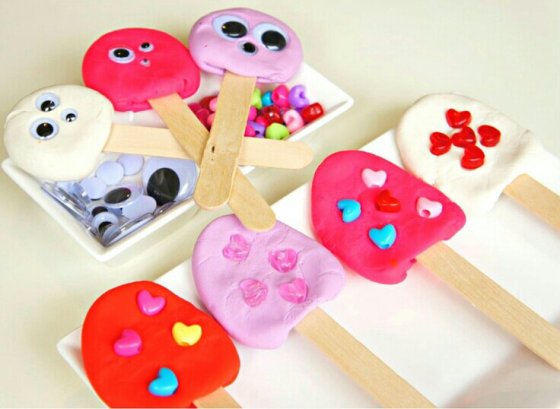
Lolly stick playdough from Seeking Shade
image

Play dough mosaic from Examiner

image

Play dough monsters from Crafts and Art for children  from Crafts and Art for Children
image

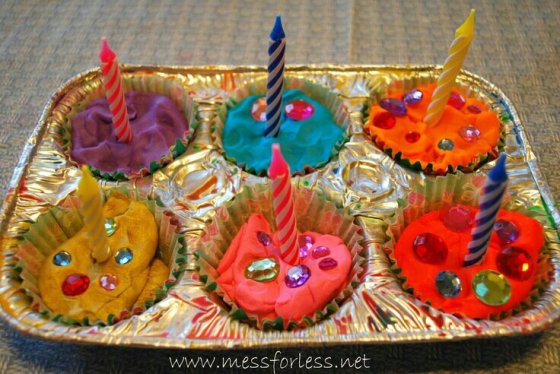
Play dough cupcakes from Mess for Less

image

Embellished playdough animals from No Time For Flashcards

image

I’m going to try and incorporate a play dough activity into each of themed weeks so look out for those!

What’s your favourite play dough activity?

2

Christmas!

Happy Boxing Day!
I hope everyone had a really lovely day. We did!
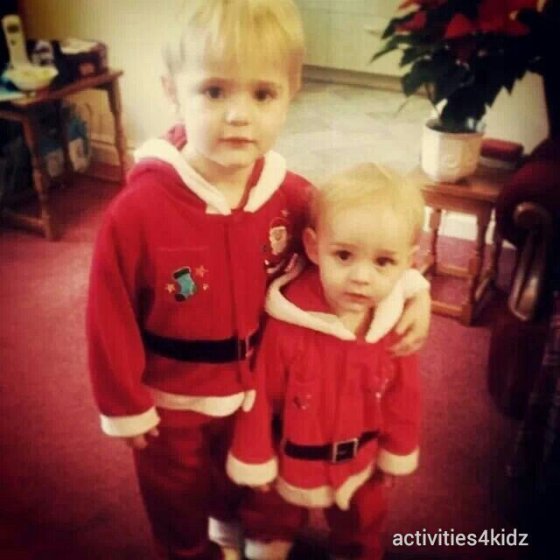
On Christmas Eve after a mad dash to four hairdressers to try and get Harrison’s haircut, we went to visit my Great Uncle. It was lively because the kids usually go a bit shy around him but not this time! They loved chasing each other around and showing off in their Santa outfits. My brother got a lovely photo of them!
image

We then went to the cemetery and laid down some flowers for my Grandad, before heading over to my Nans. It was a hit manic as always, with my parents, brothers, sister in law, the kids, my nan,my auntie, uncle and youngest cousin! It was lovely though. We then went home, stopping off to pick up a McDonald’s for tea. Once we had eaten it was time to go outside and look for Santa and his reindeer flying over (the international space station all lit up!). Harrison was amazed! We then sprinkled our Reindeer food and left out the magic key for Santa.

They had a bath and then got dressed in their new pyjama s from Nanny and Grandad. They went to bed and we enjoyed a nice glass of wine and a horror film.

We all got up about 7.30 on Christmas day which is half hour later than usual! Harrison’s face when he went down and saw all the presents was amazing. They were spoilt – happyland sets, vtech digital camera, train sets, books, dvds, clothes, market stall, toy till…. And that was before we went to my parents!!!

After breakfast we loaded up the car with gifts and went to my mum and dads, where the kids got even more playdough, happy land, clothes and gorgeous wooden Melissa and Doug toys! I was very spoilt too – I had a Hudl, two beautiful bracelets, necklace and two lovely teacups for my collection.

The rest of the day went in the normal Christmas day way – an incredible dinner cooked by mum, a few drinks, playing with new toys and gadgets and eating chocolate. When we got home the kids went straight to sleep which is unheard of – the excitement wore them out!

Today has mostly been all about setting up and playing with new toys and finding homes for them! I doubt we’ll be doing much crafty stuff for the next week whilst they play with everything, although watch out for reviews of some of their toys and loads of playdough ideas!

How was your Christmas?