2

Christmas!

Happy Boxing Day!
I hope everyone had a really lovely day. We did!
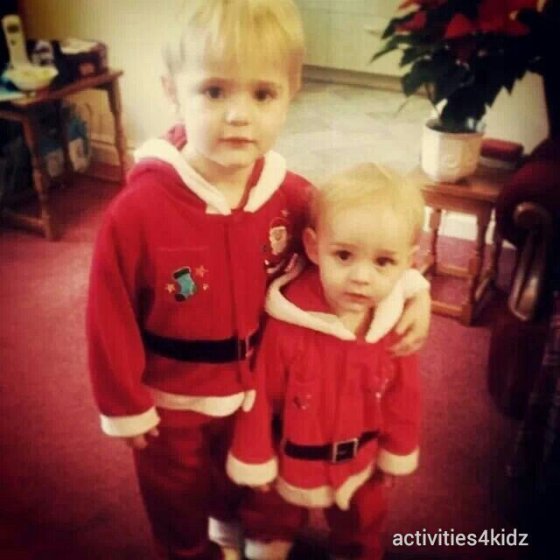
On Christmas Eve after a mad dash to four hairdressers to try and get Harrison’s haircut, we went to visit my Great Uncle. It was lively because the kids usually go a bit shy around him but not this time! They loved chasing each other around and showing off in their Santa outfits. My brother got a lovely photo of them!
image

We then went to the cemetery and laid down some flowers for my Grandad, before heading over to my Nans. It was a hit manic as always, with my parents, brothers, sister in law, the kids, my nan,my auntie, uncle and youngest cousin! It was lovely though. We then went home, stopping off to pick up a McDonald’s for tea. Once we had eaten it was time to go outside and look for Santa and his reindeer flying over (the international space station all lit up!). Harrison was amazed! We then sprinkled our Reindeer food and left out the magic key for Santa.

They had a bath and then got dressed in their new pyjama s from Nanny and Grandad. They went to bed and we enjoyed a nice glass of wine and a horror film.

We all got up about 7.30 on Christmas day which is half hour later than usual! Harrison’s face when he went down and saw all the presents was amazing. They were spoilt – happyland sets, vtech digital camera, train sets, books, dvds, clothes, market stall, toy till…. And that was before we went to my parents!!!

After breakfast we loaded up the car with gifts and went to my mum and dads, where the kids got even more playdough, happy land, clothes and gorgeous wooden Melissa and Doug toys! I was very spoilt too – I had a Hudl, two beautiful bracelets, necklace and two lovely teacups for my collection.

The rest of the day went in the normal Christmas day way – an incredible dinner cooked by mum, a few drinks, playing with new toys and gadgets and eating chocolate. When we got home the kids went straight to sleep which is unheard of – the excitement wore them out!

Today has mostly been all about setting up and playing with new toys and finding homes for them! I doubt we’ll be doing much crafty stuff for the next week whilst they play with everything, although watch out for reviews of some of their toys and loads of playdough ideas!

How was your Christmas?

0

Snowman Soup

This lovely idea was shared by my good friend Donna. I wish I’d heard of it earlier because I’ve ran out of time to make it, but thought I’d share still!

This would make a lovely gift for someone or would be perfect in a Christmas Eve box. Think we’re going to add this to our Christmas Eve box tradition next year!

To make it all you need is hot chocolate powder (enough for a decent sized mug), some mini marshmallows & a mini candy cane. You also need a copy of the poem (this is the one Donna used) which you can print off here.

“I was told you’ve been good this year
I’m always glad to hear it
With freezing weather drawing near
You’ll need to warm your spirit
So here’s a cup of snowman soup
Complete with a stirring stick
Add hot water, sip it slow
It’s sure to do the trick”

You need to put the hot chocolate powder in a bag – the icing decorating ones are probably the best as they can made into a cone shape which look good. Top with the marshmallows and then seal the bag with an elastic band. Tie a ribbon around it and attach the tag. Stick two googly eyes on to the bag and hook the candy cane on to the ribbon.
Now you have snowman soup!

20131222-182937.jpg

0

Peg people nativity scene

We’re not a religious family. To be honest, the only time we really go to church is for weddings and funerals, although when the kids are older I’d love to take them at Christmas: that aside, I think it’s so important that kids know what the true meaning of Christmas is. We may not practise it, but we are Christians so we should know about it.
Today, I made a little nativity scene to start introducing the idea to the boys.
It only took ten minutes.
With Graham’s help (and a big knife!) we cut a craft peg down to make baby Jesus. I covered an old match box in masking tape and lined it with cotton wool (if you have straw it would make a great sensory activity!). I wrapped a small piece of felt around him and tied it on with string and drew him a face with a black pen.

20131222-124035.jpg

Mary and Joseph both had little capes of felt tied on with string and felt tipped faces.

20131222-124316.jpg

The angel had a little white cape on and I used the glue gun to glue a little pipe cleaner halo on his head

20131222-124502.jpg

To try and complete it I added a few if the animals from their various sets and used play dough to hold it onto the base (a piece of cardboard).

They had fun playing with the little scene, making sure baby Jesus was cosy and tucking him in!

I will keep this little set safe so that as they get older they can use it to tell the story.

20131222-124809.jpg

0

Snow Scene

This was loosely based on something I saw on Mister Maker on CBeebies (I love that programme!)

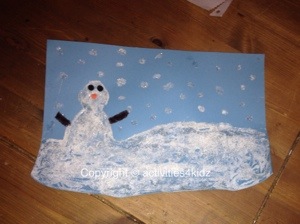
In a bowl we mixed some PVA glue with a drop of water, and in another bowl mixed some flour and glitter, and then poured the the glittery flour into an old glitter shaker (as our sieve has disappeared!).

On some blue paper I drew a wavy line to make a hill and a basic snowman outline. Harrison then had lots of fun painting the hill and snowman with the pva mixture, with lots of dots in the sky for snowflakes. Next came the really fun bit – using the glitter shaker to cover all the glue with the flour & glitter.

20131220-212620.jpg

20131220-212626.jpg

Once it was covered we shook the excess off and left it dry. To seal it (the flour goes everywhere otherwise!) I sprayed a fine layer of hairspray.

20131220-212814.jpg

We then finished it off with little pom-poms for eyes and a nose, and cut up a pipecleaner for arms.

What do you think?

20131220-213016.jpg

4

Reindeer Food

At playgroup the other day we made little bags of reindeer food which is something we are going to turn into a Christmas tradition for the kids!

The idea is you sprinkle the food out in the garden on Christmas Eve and it sparkles in the moonlight so Santa and his reindeer know exactly where to land!

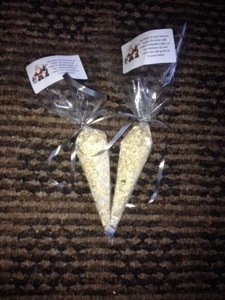
For each bag of reindeer food you will need about 4 big spoons of porridge oats, and 1 or 2 (depending on how sparkly you want it) of glitter or coloured sugar.

Mix the oats and the glitter/sugar together. Hold a small clear bag – we twisted ours into a cone shape – and secure. Tie some Christmassy ribbon around and attach a tag with the following poem on:

Sprinkle this reindeer food outside tonight
The moonlight will make it sparkle bright
As the reindeer fly and roam
This will guide them to your home

Alternatively, print a tag off here

We will be sprinkling ours outside on Christmas Eve and leaving it with the special key for Santa to get in, before getting into our new pjs and watching The Snowman!

Don’t forget to leave a mince pie and milk out for Santa!

20131220-045132.jpg

8

The Little Letter Company

Coming home from our playgroup Christmas party we had a lovely surprise waiting in the letterbox – a bright red envelope from ‘The Little Letter Company’!

The Little Letter Company, for a subscription fee, send a craft kit out to you every week. Ours was a trial for the purpose of this review and I was very impressed!

Our kit from Harrison consisted of a Christmas snowman mosaic activity. There was a lovely snowman scene printed on thick sturdy card with numbers printed on. These numbers correspond with the colours of the foam sticker squares and sparkly 3d gems included in the pack. The idea behind this is that kids stick the coloured foam squares on to create a mosaic effect.

20131219-130540.jpg

Although Harrison is only two, TLLC packs aren’t designed for children under the age of 36 months (which the lovely lady I spoke to over email pointed out) as they do contain some very small parts, so, as with all craft activities, Harrison (and Alex!) were very closely supervised.
It was quite fiddly and Harrison did find it challenging although he really enjoyed it. I liked that – if something is too easy it can be boring! For a slightly older child this would be a perfect low mess independent activity.
I have to admit once Harrison moved on to playing with something else (as toddlers do!) I really enjoyed carrying on and doing it!
It was a perfect activity for developing fine motor skills. You could let older kids have a go at using tweezers to pick the bits up. What I really loved was the information sheet that can with it.
It was a lovely clear sheet with lots of ways of approaching the craft with your child depending on their age and ability and discussed the different ways you can incorporate numeracy, matching and coordination skills. As a former primary school teacher I love activities that encourage development skills, but as TLLC points out, “the main objective is for the child to enjoy their craft activity, even if their approach/objectives differ from your own”, and that rather than being seen as a ‘lesson’, it’s a fun and enjoyable activity, which sums up what crafting is all about!

When Harrison turns three next year I think I will be subscribing to this. For as little as £2 a week (what can you get for £2 these days?!) you get an activity with all the resources delivered to your door. I can imagine kids getting really excited seeing a brightly coloured envelope addressed personally to them arrive in the letterbox! If your stuck for a gift for kids age 3-5 a subscription to this would make a great gift that lasts all year. Look out for a giveaway on the blog from TLLC in the new year and try it for yourself!

20131219-132421.jpg

Visit their website here or follow them on Twitter @LittleLetterCo

Disclaimer:
I received a pack from The Little Letter Company for the purpose of this review, but all thoughts and opinions expressed are my own.

Family Fever
0

Melted snowman

Today we made some melted snowman, inspired by this post by Kiwi Crate.
Such a simple, abstract activity that is perfect for toddlers as there is no right or wrong way to do it. We just used our sponge paintbrushes (which we get from The Works to splodge white paint onto blue paper. Once it was dry, Harrison glued on googly eyes, punched out circles of black paper for buttons, a cut out hat and scarf and an orange nose. He could put these wherever he wanted! It was a great opportunity for some early science – we talked about the snowman melting when he gets warm.

What do you think?

20131213-160832.jpg

2

Christmas cookies

We haven’t done much baking lately so on Tuesday evening we decided to make some Christmas cookies!
We used a Mary Berry recipe but as usual adapted it 🙂 I’m no cook but these were easy to make and the kids enjoyed helping to mix and decorate!

Ingredients

100g/4oz softened butter
225g/8oz self raising flour
Zest of 1 lemon, finely grated (we improvised & used some lemon juice!)
100g/4oz caster sugar
1 beaten egg
1 tbspn milk

To decorate: 2tbsp lemon juice, 175g/6oz icing sugar

Preheat oven to 190c/gas mark 5
Grease and line two baking trays
Place butter and flour into a bowl and rib with your fingers until it resembles breadcrumbs. Add zest of lemon, sugar, egg and milk. Bring together dough by hand and chill in fridge for 30 mins before rolling.
Roll out the dough thinly onto a floured surface and cut out shapes using a pastry cutter.
Place the shapes on the baking trays.
Bake for 10-15 minutes until they’re a pale golden brown and firm in the middle. Leave to cool on a wire rack.
Sieve icing sugar into a bowl and stir in lemon juice until spreadable consistency. Pipe or spread on and finish with silver balls or other decorations.

20131210-205853.jpg

We used blue food colouring in our icing (and was slightly heavy-handed!) so we dripped it onto biscuits and then decorated it with Christmassy decorations. What do you think?

<img src="https://activities4kidz.files.wordpress.com/2013/12/20131210-210032.jpg" alt="20131210-210032.jpg"

For another yummy Christmas cookie recipe hop over to Ellie bear Babi to have a go at her lovely biscuits.
We’re attempting these next week!

3

Snow dough: a messy sensory activity

Today I was brave and attempted some messy sensory play – a big deal with two
toddlers and a fully carpeted house!
We had a go at snow dough. In a plastic tub we mixed cornflour and shaving foam. It took quite a bit of experimenting to get the consistency right but I think it was roughly equal parts in the end.
I then dumped in some pine cones and twigs that we collected on one of our autumn walks and some baubles. I lay down a cheap shower curtain on the living room floor in an attempt to keep the mess contained. It did still manage to get everywhere but was easily vacuumed up afterwards.
As soon as I put it down Harrison was enthralled and identified it as ‘snow’. He picked it up and sprinkled it, telling me it was snowing and then used the twigs to draw patterns in it.

20131207-140221.jpg

What he did next was lovely. He took the toys from his school house set and created his own little small world in the tub, with a swing, slide, roundabout and the little characters. He used the pinecones as trees and had great fun in making it snow over his little scene.

20131207-140428.jpg
He then realised if he compacted the ‘snow’ down he could use his hands and other objects to stamp impressions into it.
His next request was for me to add some water to the tub. I wanted to say no because of the mess, but then realised that’s the whole point of messy sensory play. We tipped a small cup of water in it to make ‘gloop’ and mixed it up using the twigs. Harrison described it as ‘gluey’

20131207-141022.jpg

It kept Harrison amused for a good hour, not bad for a two year old with the attention span of a gnat! Alex played with it on and off but he’s poorly today so nothing really holds his attention.

A messy but fun activity – have a go!

20131207-141105.jpg

Post Comment Love
1

Snowflakes

The kids spent most of the day watching Christmas films and playing with their toys so we had a lovely chilled out day.
For an arty activity, we made good old paper snowflakes. So easy and so effective!

You will need: white paper, a dish or something circular to draw around, scissors, glue stuck, sequins or glitter & coloured paper or tissue paper.

I adapted this from the Usborne book, available from Amazon.

First you need to draw around something circular. I used a small bowl, but it depends on what size you want your snowflake to be.

20131206-194918.jpg

You the need to cut it out and fold the circle in half, and then in half again (excellent fractions teaching/learning opportunity!)

Cut off the corner tip of the cone shape and then snip little triangles and other shapes leaving paper in between them to hold it together.

20131206-195840.jpg

Depending on your artistic capabilities and level of patience (neither my strong points!) you could do some really funky patterns. I’ve seen some brilliant Star Wars themed ones here!

Once you have made your cuts, open it and ta-da – you have your snowflake

20131206-195756.jpg

This bit is the fun bit! Cover one side of the snowflake in glue and then go crazy with the glitter, sequins, jewels, whatever you want to decorate your snowflake.
Once it’s decorated, shake off excess glitter. I then cut out a circle of coloured paper the same size as the snowflake and stuck it on so you could see the coloured paper through the holes in the snowflake. If you were going to put these on the window it round be nice using tissue paper instead as the light would shine through it. We stuck ours up in the kitchen.

Have a go!!!

20131206-200444.jpg